Equipment
|
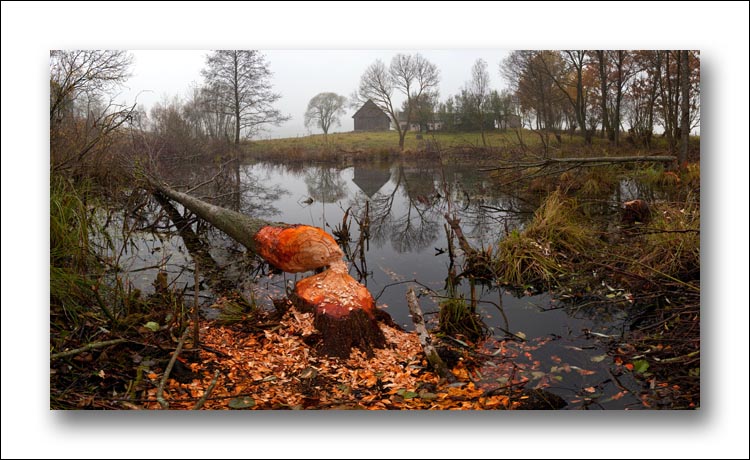
Digital Panoramic Photography |
| Extending Depth of Field (DOF) in Multirow Panoramas |
|
|
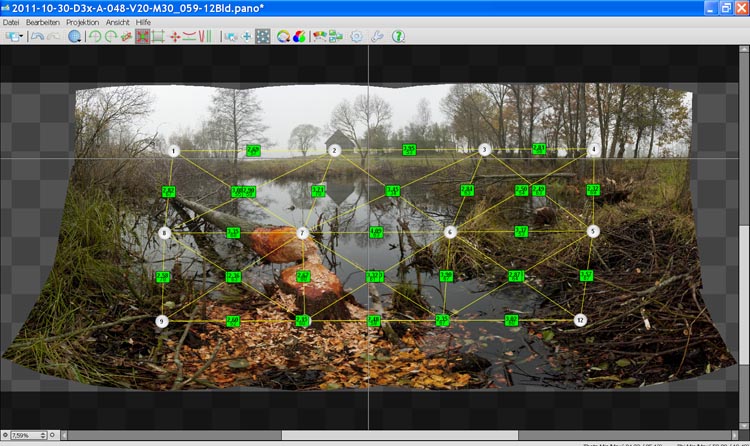
What I was realy
missing in panorama photography was the tilt-function of large formate cameras.
Now I found an easy way to simulate the tilt-function in multirow panorama
photographs. |
|
|
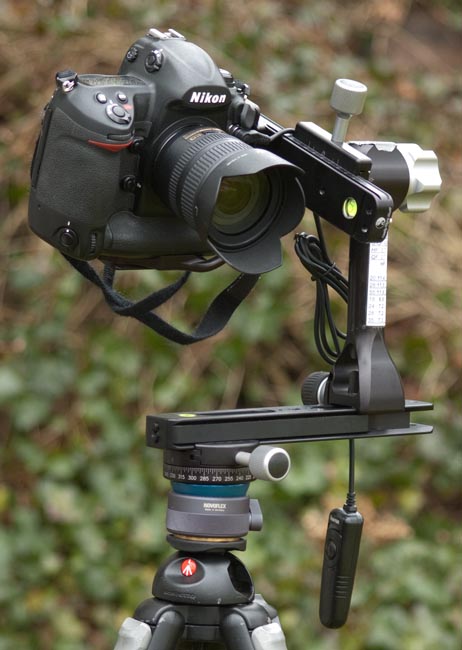
The
first step to create panoramas with extendet depth of field was to change the
position of the camera in the panohead from vertical to horizontal. An
L-plate makes this possible. |
|
|
|
|
|
|
|
|
|
|
|
|
|
________________________________________________________
My Equipment For Classical Large-Formate-Photography
(from 1994 to 2009, last update in 2008)
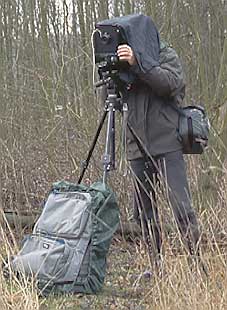
Careful design of each single photograph and a maximum of details are the
aims that I'm followeng when photographing with the large format camera. I have
to accept that I can not photgraph moving motives with this technnique.
Basic equipment:
camera, tripod, black cloth,
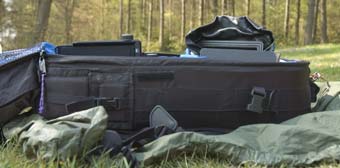
shoulder bag for small tools,
backpack with protective cover
Basic Equipment:
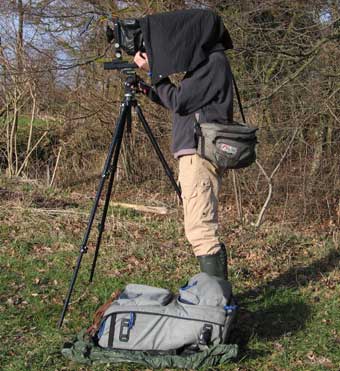
Arca Swiss F-Line:
This Large-format-camera is lightweight and I can put it into my backpack as a
whole. The camera I have chosen is a monorail, that means I can use an extreme
wide-angle lens (45 mm) as well as a long tele-lens (360 mm). I mainly use
roll-film for 6x9-cm transparencies. But I always carry some filmholders with
4x5"-sheet-film with me to shoot very promising motivs with this film.
_______________________
Lenses (all Schneider-Kreuznach):
Super-Angulon 5,6 /47 mounted on recessed lens board. (My older version
is only for 6x9cm). It must be used with Centerfilter
Super-Angulon 5,6/75 with Centerfilter
Apo-Symmar 5,6/120
Apo-Symmar 5,6/210
Apo-Artar 1:9/360 - This Lens with aperture 1:9 is not too heavy.
All lenses are mounted in Copal-shutters.
2 (or 1) Roll-film backs for 120-rolls
Cut-filmholders for 4x5" sheet-film
Film:
Transparencies:
Fuji RVP 100 Velvia (100 ASA) in 120 rolls and 4x5" sheet
Negativ:
Fujicolor Reala 100 (100 ASA)
I have made a detachable black frame to indicate the 6x9 format on the 4x5"
ground glass.
__________________________________
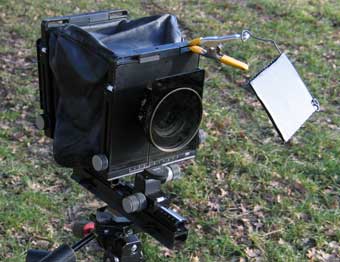
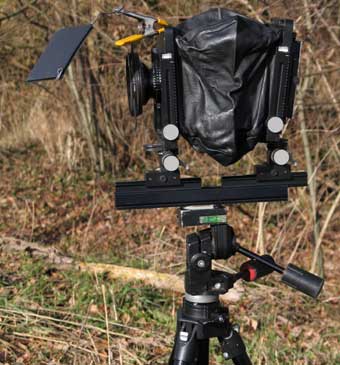
my Arca Swiss F-line
this time with the Apo-Symmar 5,6/210,
graduated neutral density filter,
wide angle bellow and
lens shade
Backpack, small bag and tripod are the
luggage I'm carrying on my hiking tours.
All the gear together weighs 20 to 24 kg. That is a considerable limitation
to my hiking tours, but daytrips are (still) possible.
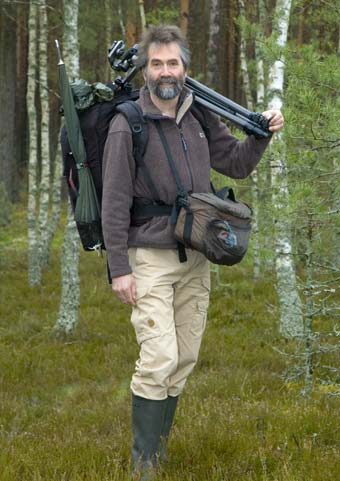
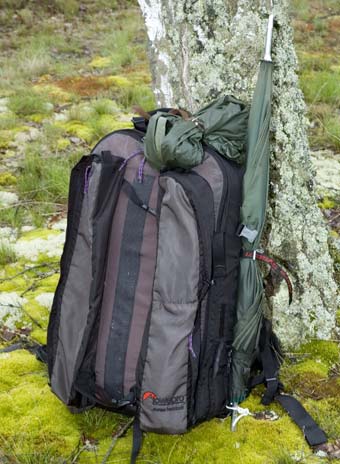
A raincoat is always attached to the outside, the umbrella only sometimes.
Seperate raincoat for backpacks. This plasitc-sheet is always put on the ground under the backpack. This is particularly important on wet ground, in snow, in grass with many tiny snails, in freshly fertilised meadows.
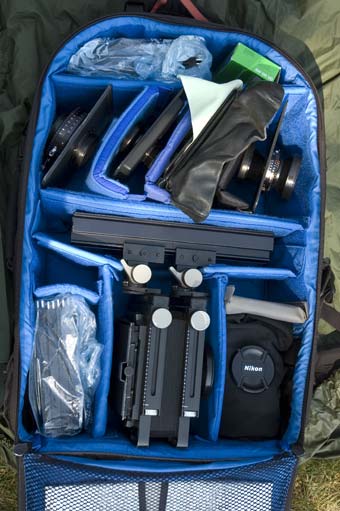
Configuration:
top: Film-rolls and sheet-film-holders in a plastic-bag
there below: 4 lenses and the second bellow.
in the middle: Camera, top to bottem, with 1 lens and bellow mounted.
bottem left: Sheet-film-holders
bottem right: Digital SLRS (not visible as I took the photograph with it)
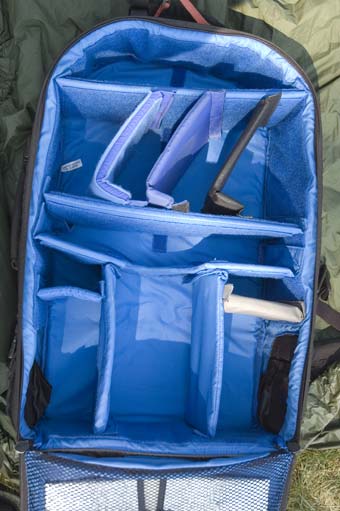
The configuration is realized with dividers
from various photobags. There are not enough dividers provided with this
backpack.
__________________________________
Accessories:
Small bag. Standing behind the camera with the
backpack some meters off, it is comfortable to have some small accesories at
hand.
Content (top down):
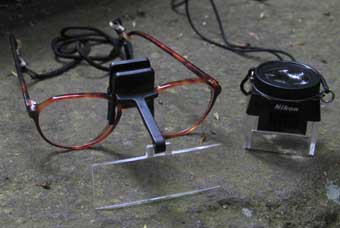
Reading glasses with clip-on magnifier in a box
two flat protective bags containing graduated neutral density filters
Gossen spotmatic meter
Three filters in plastic-boxes, with
magnifier on top
roll-film back
front-pocket: motiv-finder, cable-release,
adapter rings for filters (not visible)
Filters:
Polarizing filter 105E
2 centerfilters
2graduated ND-filters 100x150 mm:
ND0,6 hard edge
ND0,6 soft edge
Filterholder 105E
and adapter-rings from Heliopan
Selfmade lens-shade
Black cloth (selfmade)

View onto the small shoulder-bag
Lens shade and
graduated ND-filter
Reading glasses with clip-on lens system labo-clip binocular 2.0 x
(www.eschenbach-optic.com)
Nikon magnifier 8x
Motive-finder (selfmade):
Frame of black plastic
outside dimension 20 x 16 cm
cutout 12 x 8 cm
Lace with knots
This is my favorite acessory, because it enables me to check the motiv
without setting up the camera. I can find out the exact camera-position and the
suitable focal length.
For many years I had to guess which lens I should choose whenever I faced a new
motive.
But now the frame helps me to find the right place to put up the camera. I
simply look through the frame towards the motive. Moving the frame foth and back
helps me fixing the outout. Then one hand holds the lice at its first knod
together with the frame infront of my face.
With the other hand I draw the lice streight to the tip of my nose. The knod
that touches my nose tells me, with lens I should chose. The first knot is
related to the 47-mm-lens, the second to the 75-mm-lens, and so on until the
last knot, which is related to the 360-mm-telelens. I have a lice for the
6x9-cm-film and another one for the 4x5-inch-film. These selfmade parts turned
out to be very usefull.
___________________________________
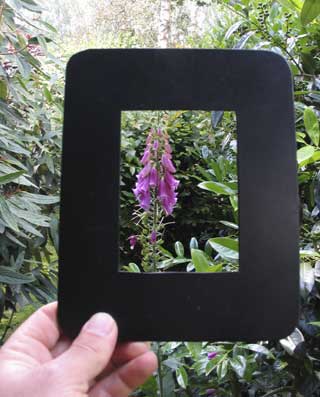
Frame of black plastic used as a motive-finder
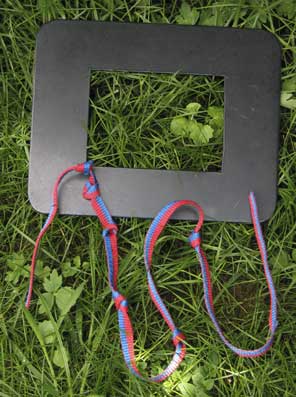
Motive-finder and lace with knods
Tripod with accessories:
Since 2007 I use the lightweight
Manfroto-tripod Magfiber Pro 055MF3
together with an extemly lightweight
Mamiya Magnesium 3-way-head AW 701.
A Kirk Quick release shoe QRC-4
holds the monorail of the camera.
Before 2007 I used a Manfrotto 055C tripod with a 3-way-head 229. This
combination weights more and might be a bit more stable. So it is always kept in
reserve in my car.
A set of snowshoes
(Manfrotto) is very usefull in deep snow, sand or mud.
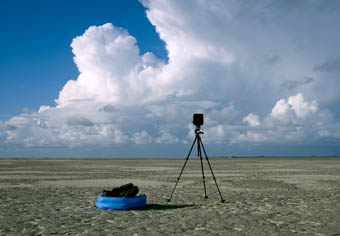
Most subjects are discovered from eye height, therefor the tripod must be so
high that I can stand upright when looking through the camera.
A mount to clamp an umbrella to the tripod is very
usefull as long as it is windless! I got mine from Protec (Protec Schirmhalter),
but it is offered no more.
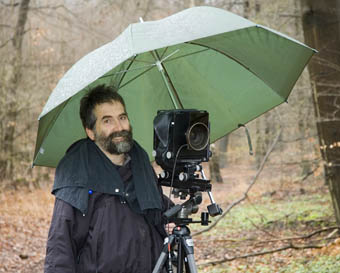
It can not always be avoided that water pours down from the
umbrella streight to my neck. That doesn't bother me too much as long as the
graduated filter and the camera remain dry!
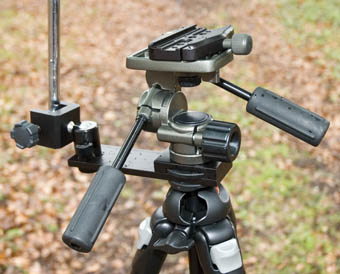
Mount with umbrella, Mamiya AW701 head and Kirk quick release shoe QRC-4

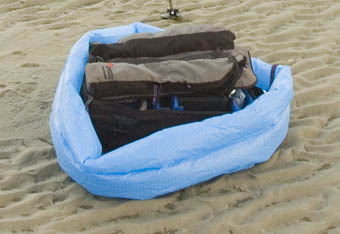
The umbrella for the camera should always be combined with
rain trusers for the photographer. As long as you are warm and dry photographing
in rainy weather is real fun!
Half-inflated it can be attached to the backpack with a lace. So other hikers might gess, what a backpack with light blue wing is good for.
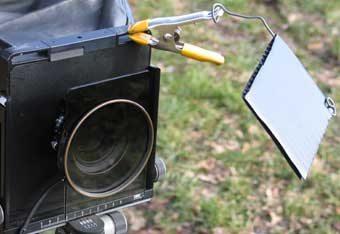
Accessories for close-up photography:
Template
which shows the exposure-compensation in f-stops for the extension with a given
lens.
Small reflector-screen
__________________________________
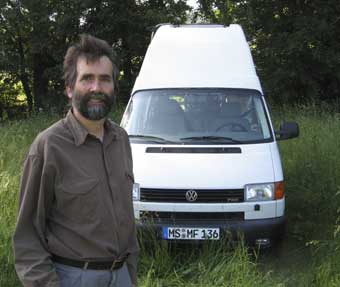
Transportation:
A campmobile (VW-syncro- Transporter, long
version) was equiped following my plans:
- much storage space,
- a steel locker for photographic equipment,
-suitability in hot summer weather and in
winter,
- a bicycle rack at the back of the car.
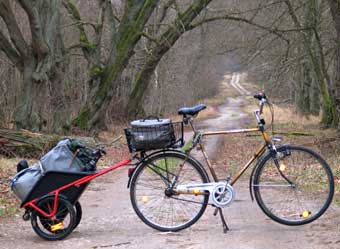
Summer: bicycle with trailer (Winther Donkey
The trailer carries the backpack and the tripod. The wheels are rather
large, which ist good on bumpy roads. An extra large basket is screwed to the
rear rack of the bicycle. This basket carries the shoulder-bag. So I can travel
long trips on small paths without carrying the heavy equipment.

Winter: Snowshoes
My
MSR Denali Classic with 8"-tails are essential in deep snow
The tail helps hiking up. Descending is easier with the tails off.